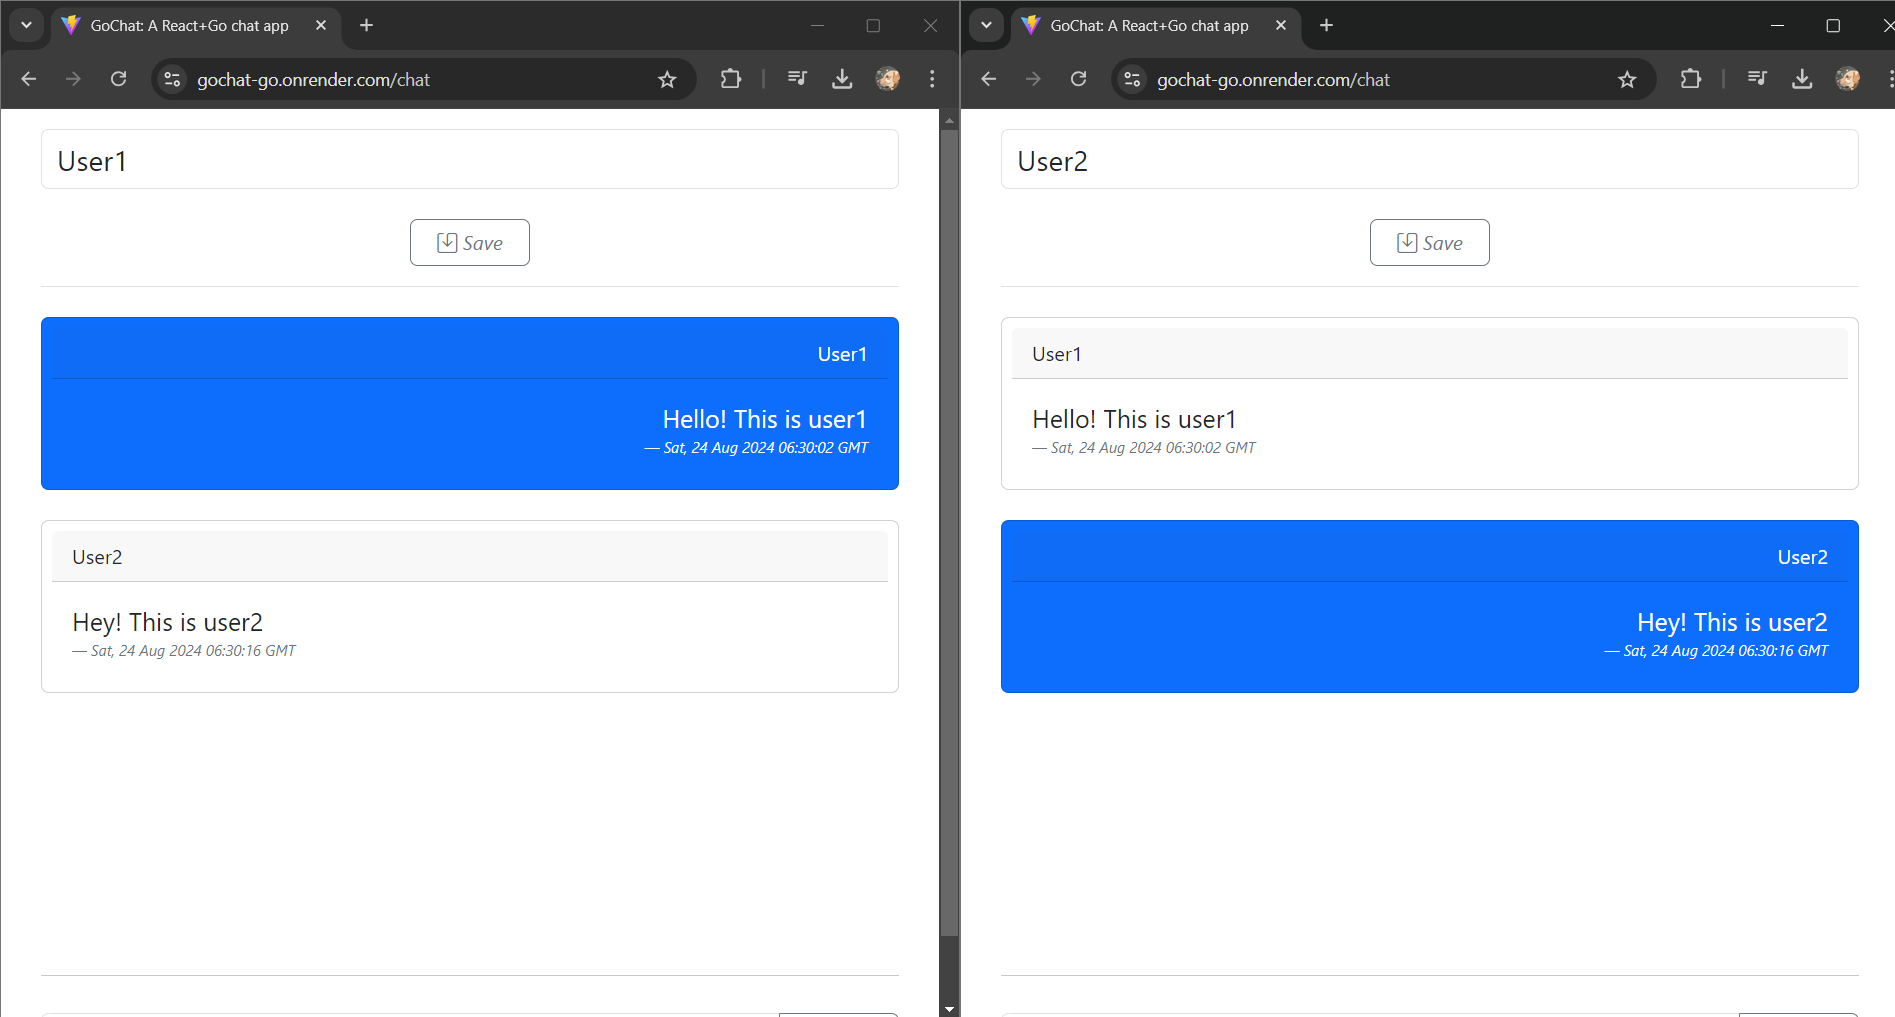
In this blog post, we’ll explore how to build a real-time chat application using Go and React. Our app, Gochat, leverages WebSockets to enable instant messaging between users. You can check out the live demo here.

Introduction
Real-time communication is a crucial feature for modern web applications. Whether it’s for customer support, social networking, or collaborative tools, the ability to send and receive messages instantly enhances user experience. In this tutorial, we’ll walk through the process of creating a chat application using Go for the backend and React for the frontend.
Why Go and React?
Go: Known for its simplicity and performance, Go is an excellent choice for building scalable backend services. Its concurrency model, based on goroutines and channels, makes it ideal for real-time applications.
React: A popular JavaScript library for building user interfaces, React allows us to create dynamic and responsive frontends. Its component-based architecture makes it easy to manage and update the UI.
Setting Up the Project
Backend with Go
Initialize the Go Project
mkdir gochat
cd gochat
mkdir gochat-server
cd gochat-server
go mod init github.com/<your-id>/GoChat-Go
Install Dependencies: We’ll use the Gorilla WebSocket package to handle WebSocket connections.
go get github.com/gorilla/websocketCreate the WebSocket Server
main.go
// Module: github.com/<your-id>/GoChat-Go
package main

import (
    "fmt"
    "log"
    "net"
    "net/http"
    "os"

    "github.com/<your-id>/GoChat-Go/setupRouter"
    "github.com/joho/godotenv"
)

func main() {

    fmt.Println("************************************************")
    fmt.Println("Go-Chat Chat App v0.01")
    fmt.Println("************************************************")
    setupRouter.SetupRouter()

    listener, err := net.Listen("tcp", ":0")
    if err != nil {
        panic(err)
    }

    fmt.Println("************************************************")
    fmt.Println("Using IP:", listener.Addr().(*net.TCPAddr).IP)
    fmt.Println("Using port:", listener.Addr().(*net.TCPAddr).Port)
    fmt.Println("************************************************")

    panic(http.Serve(listener, nil))
}
Set up your router
setupRouter/setupRouter.go
package setupRouter

import (
    "fmt"
    "log"
    "net/http"
    "os"
    "time"

    "github.com/gorilla/websocket"
)

var upgrader = websocket.Upgrader{
    ReadBufferSize:  1024,
    WriteBufferSize: 1024,
    CheckOrigin:     func(r *http.Request) bool { return true },
}

func Upgrade(w http.ResponseWriter, r *http.Request) (*websocket.Conn, error) {
    ws, err := upgrader.Upgrade(w, r, nil)

    if err != nil {
        fmt.Fprintln(w, "Unable to setup WebSocket connection")
        return ws, err
    }
    return ws, nil
}

// define our WebSocket endpoint
func serverWs(pool *Pool, w http.ResponseWriter, r *http.Request) {

    // upgrade this connection to a WebSocket
    conn, err := Upgrade(w, r)
    if err != nil {
        log.Println(w, "Unable to setup WebSocket connection")
        return
    }

    client := &Client{
        ID:   fmt.Sprintf("%v", time.Now().UnixMilli()),
        Conn: conn,
        Pool: pool,
    }

    pool.Register <- client
    client.Read()
}

func SetupRouter() {
    pool := NewPool()
    go pool.Start()

    // handle our `/ws` endpoint to the `serveWs` function
    http.HandleFunc("/ws", func(w http.ResponseWriter, r *http.Request) {
        serverWs(pool, w, r)
    })
}
Create/setup your pool methods
setupRouter/pool.go
package setupRouter

import (
    "fmt"
    "log"
)

type Pool struct {
    Register   chan *Client
    Unregister chan *Client
    Clients    map[*Client]bool
    Broadcast  chan Message
}

func NewPool() *Pool {
    return &Pool{
        Register:   make(chan *Client),
        Unregister: make(chan *Client),
        Clients:    make(map[*Client]bool),
        Broadcast:  make(chan Message),
    }
}

func (pool *Pool) Start() {
    for {
        select {
        case client := <-pool.Register:
            pool.Clients[client] = true
            log.Println("Pool Size: ", len(pool.Clients))
            for client, _ := range pool.Clients {
                log.Println("New client registered:", client.ID)
                client.Conn.WriteJSON(Message{Type: 0, Body: "New User Joined..."})
            }
            break

        case client := <-pool.Unregister:
            delete(pool.Clients, client)
            log.Println("Pool Size: ", len(pool.Clients))
            for client, _ := range pool.Clients {
                log.Println("Client disconnected", client.ID)
                client.Conn.WriteJSON(Message{Type: 0, Body: fmt.Sprintf("User %s disconnected ", client.ID)})
            }
            break

        case message := <-pool.Broadcast:
            log.Println("Sending message to all clients in Pool")
            for client, _ := range pool.Clients {
                if err := client.Conn.WriteJSON(message); err != nil {
                    log.Fatalln("Error: ", err)
                    return
                }
            }
        }
    }
}
Create/setup your client methods
setupRouter/client.go
package setupRouter

import (
    "fmt"
    "log"
)

type Pool struct {
    Register   chan *Client
    Unregister chan *Client
    Clients    map[*Client]bool
    Broadcast  chan Message
}

func NewPool() *Pool {
    return &Pool{
        Register:   make(chan *Client),
        Unregister: make(chan *Client),
        Clients:    make(map[*Client]bool),
        Broadcast:  make(chan Message),
    }
}

func (pool *Pool) Start() {
    for {
        select {
        case client := <-pool.Register:
            pool.Clients[client] = true
            log.Println("Pool Size: ", len(pool.Clients))
            for client, _ := range pool.Clients {
                log.Println("New client registered:", client.ID)
                client.Conn.WriteJSON(Message{Type: 0, Body: "New User Joined..."})
            }
            break

        case client := <-pool.Unregister:
            delete(pool.Clients, client)
            log.Println("Pool Size: ", len(pool.Clients))
            for client, _ := range pool.Clients {
                log.Println("Client disconnected", client.ID)
                client.Conn.WriteJSON(Message{Type: 0, Body: fmt.Sprintf("User %s disconnected ", client.ID)})
            }
            break

        case message := <-pool.Broadcast:
            log.Println("Sending message to all clients in Pool")
            for client, _ := range pool.Clients {
                if err := client.Conn.WriteJSON(message); err != nil {
                    log.Fatalln("Error: ", err)
                    return
                }
            }
        }
    }
}
Finally create a Dockerfile for your server components.
.Dockerfile
FROM golang:1.22.5

RUN mkdir /app
ADD . /app/
WORKDIR /app
RUN go mod download
RUN go build -o main
CMD ["/app/main"]
Initialize your server directory with
gitand upload it to your remote repository. You can check out the steps here.Before that, make sure you test your code and confirm it is working. You can use
postmanto test the websocket connections.For referencing the source code: here
Frontend with React
You can refer the frontend part from here for now. Will update the blog soon…
Conclusion
In this tutorial, we’ve built a simple real-time chat application using Go and React. By leveraging WebSockets, we’ve enabled instant communication between users. This project demonstrates the power of combining Go’s performance with React’s flexibility to create a responsive and scalable web application.
Feel free to explore the code and customize it to fit your needs. Happy coding!